Zumbo’s Just Desserts [food show review]

Guys, remember Adriano Zumbo from Master Chef Australia? Well, how can you not. He is known for his magical yet deadly dessert challenges and ofcourse the croquembouche tower from season 1. His desserts are totally on another level and he now runs a chain of seven patisseries in Sydney and Melbourne. I have been following ZumboPatisserie on instagram and i just love the feed.

Now, guess what?! Adriano Zumbo has his own show on TV which was aired first on Monday, August 22.  It’s called Zumbo’s Just Desserts, an Australian baking/dessert competition where 12 best amateur dessert-makers compete for a $100,000 prize and will get to see one of their creations featured in Zumbo’s shops. Sounds awesome, doesn’t it.

I’m just going to talk a little about this show and what i thought of it. But let me tell you, if you are a passionate baker just go ahead and watch it and decide how you like it.

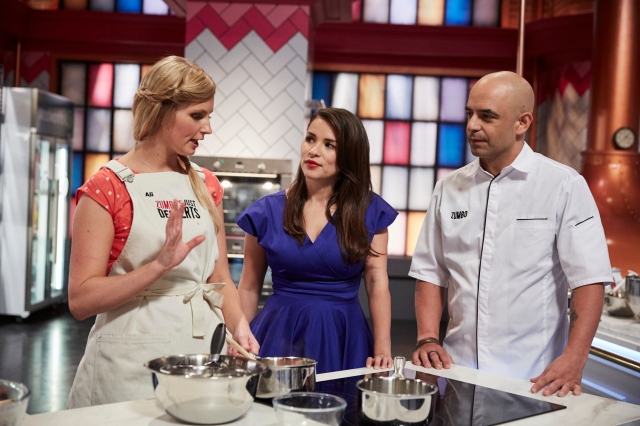
So, imagine a dessert magician paired with British celebrity chef Rachel Khoo – Now, that’s a perfect match and a dream come true for me. Hooray! I was so excited to be watching her in a food show again. Yes you got it, i pretty much adore her.

Adriano Zumbo and Rachel Khoo are the hosts of the show along with Gigi Falanga. Gigi who? She’s a former Brazilian model turned pastry chef. Gigi has worked alongside Anna Polyviou – the punk princess of the pastry world and apparently she’s the rising star of the dessert scene. So, 3 hosts from different backgrounds and experiences, which should have made it an interesting show you would think, or not. But before getting into the details, let me get back to the charming Rachel Khoo. I gotta confess I’m totally biased when it comes to her – I love Rachel Khoo and everything about her. I can watch her show The Little Paris Kitchen on repeat for days and i won’t mind. If you haven’t seen it yet you should. Let me warn you, you will also fall in love with Paris and the world famous French boulangeries and cafes. Now you know what my next travel destination on the bucket list is.

the hosts

Concept of the show is nothing new though. In fact its like MasterChef and Great Australian Bake-off whisked together. Not very original. Anyway, so the show begins with splashes of color, candy and all things sweet – It’s obviously inspired by the Willy Wonka Chocolate Factory theme and Rachel calls it the dessert factory. It’s like dessert, magic and art coming together in one place. The next episode promos show a floating dessert. Yup, a gravity defying work of edible art. Like, woah! would love to see that one. As the show goes on it doesn’t instantly pull the viewer in except for us gawking over Zumbo’s crazy dessert creations. But, even with all the magical effects it seems meh – or maybe its just me.

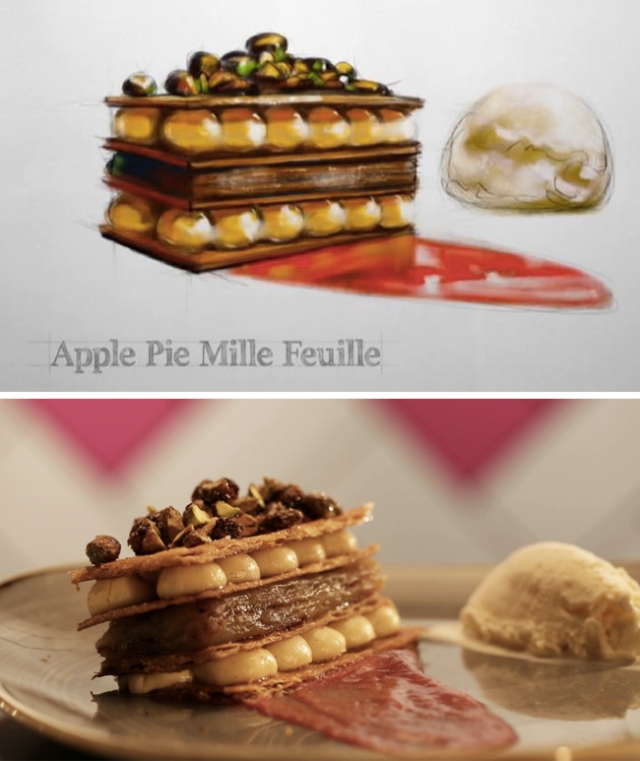
In the first episode the contestants were challenged to use their imagination and create a dessert that’s a “reflection of yourself” in just three hours. Kate’s Apple Pie Mille Feuille was the winner of the day and i definitely have my eyes on that one. Gotta give it a shot soon. You can find the recipe for it here.

winner dessert

Adriano Zumbo is no doubt a talented and renowned patissier, but unfortunately he doesn’t have a TV personality. He could have been a mentor or a tasting judge but creating an entire show on him wasn’t the best of ideas. The hosts actually need to relax and be more fun and engaging to make it work.

I don’t mind the quirky set as much as the voice overs, the annoying buzzing clock (reminds me of the series ’24’) and the candy music, it all just lacks a maturity that’s very much needed if it wants to appeal to a wide audience. But on the other hand i also think that this show is not for anyone and everyone. Only the most passionate bakers and cooks with experience would be interested in watching. But if the show had been more interactive with a bit more energy like other successful food shows, I’m sure dessert lovers would be inspired and motivated to watch and try out the desserts made on the show.

I was reading some tweets about how this show is a rip off of other good shows and i really think it should be given a chance and not outright be labeled as a disaster. Let’s not be so cruel guys. I will admit I wasn’t glued to the first episode like i expected i would be, after all its DESSERTS we are talking about. But it was bit of a drag, and it’s not the kind of show where you get to learn heaps about food and dessert, its more like eye candy with desserts you can only drool over.

So, if you get a chance to watch it, let me know what you think.

“Set yourself a vision and chase it, and also be creative. Use your imagination, believe in it, believe in yourself and believe in what you think of and do it.” – Adriano Zumbo

set

contestants

General Tso inspired Fish

I came across this recipe which is quite famous in American-Chinese cuisine, the General Tso’s Chicken. I had all the ingredients and fresh fish fingers on hand so i thought, why not. So i simply replaced the chicken with the fish and it turned out delicious. I could have probably devoured the entire dish myself if given the chance.

Oh and you know, according to wikipedia the dish is named after Tso Tsung-t’ang, a Qing dynasty military leader. But guess what?! there is no recorded connection to him nor is the dish known in Tso’s home province. Ha! well in my 10 minute research about him i did learn that he was a successful leader and was admired by the generals that came after him. Great!

Lets get down to admiring this delicious dish now. You should really try this recipe for a quick, easy meal and yet so flavorful.

General Tso's fish

I know, i know i took a quick shot because i was too hungry and couldn’t resist eating this any longer. I have no self control, sigh!

INGREDIENTS:
1. fish fingers, cubed – 1/2 kg
Marinate with:  1/2 tsp salt, 1/2 tsp pepper, 1 tsp soya sauce, 1 tsp lemon juice, beaten egg and 1 tblsp cornflour

For the sauce:
1. soya sauce – 2 tblsp
2. tomato ketchup – 2 tblsp
3. vinegar – 1 tblsp
4. brown sugar – 1 tsp
5. red chilli flakes – 1 tsp
6. chinese salt – 1/2 tsp
7. chicken stock/fish stock OR water – 1/2 cup
8. spring onions – 2 stalks, chopped up
9. garlic cloves – 2, minced
10. ginger, 1 tblsp, finely chopped
11. oil – 2-3 tblsp
12. cornflour – 1 tblsp, for thickening if required
13. toasted sesame seeds for garnish

DIRECTIONS:
– marinate the fish for about 30 mins.
– Fry it in shallow oil. Just cook until both sides are colored, dont over cook it. It should only take a minute or 2. Drain and set aside.
– to make the sauce: combine soya sauce, ketchup, vinegar, brown sugar, red chilli flakes, chinese salt in a bowl. mix it up, add water, mix and set aside.
– Heat oil in a wok or any pan you want to use. Add in the garlic and ginger. saute for a few seconds until aromatic, dont let it turn golden. Add the sauce mix and let it simmer and cook until it thickens up a bit.
– Add the spring onions. If you thick the sauce is too watery add some cornflour mixed in water. once you think the consistency is right, add the fried fish and mix to coat it up.
– Let it simmer for a minute and then dish it out.
– Garnish with sesame seeds and serve with rice.

Salted Cracker Toffee

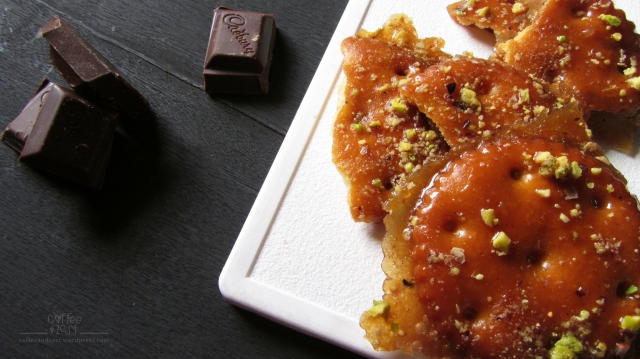
Cracker toffee. Yes, I’m serious. Let me also warn you they are so very addictive.

A toffee made with salted crackers topped with toffee caramel and baked until its hardened to a crack. It’s the perfect combination of salty, sweet and buttery. So crazy good and so easy to make. Every bite into that crack makes you go Mmmm – which in case you’re wondering simply translates to gimme more gimme more. I’ve absolutely convinced myself that i don’t need to worry about the expanding waist line, this cracker toffee is totally worth it.

Plus, you don’t even need to fuss with a candy thermometer for this! Its as easy as bringing the mixture to a boil and setting a timer. That’s it! Now, I’m sure that’s all the encouragement you need. Go make it, share it, eat it.

For variations you can try topping the toffee layer with all kinds of nuts, peanut butter, chocolate chips, M&Ms, a drizzle of white chocolate and anything else you can think of.

IMG_7143

Ingredients:

  • approx 16 salted Crackers
  • 1/2 cup butter
  • 1/2 cup brown sugar
  • Pistachios, toasted and chopped up for sprinkling on top

Directions:

  1. Preheat oven to 400ºF. Prepare a cookie sheet by lining it with baking paper.
  2. Place the crackers in a single layer on the cookie sheet. Put it on a counter top near you.
  3. In medium saucepan melt the butter over medium-high heat. Mix in the brown sugar with a spatula removing any sugar lumps.
  4. Let it come to a boil and then set a timer for 3 minutes.
  5. Let it boil without stirring. After 3 minutes, remove from heat immediately.
  6. Pour this caramel mixture over the crackers, and use a spatula to gently spread the toffee over the crackers if required. (If in case the butter separates from the caramel at this stage, don’t fret. You can still use this by draining of the excess butter into a small bowl and use the rest of the caramel mixture to pour over the crackers.)
  7. Once you have the caramel layer in place, sprinkle with the chopped pistachios or any other nuts you prefer and bake for 6 minutes.
  8. Remove from oven and let cool completely to harden the toffee.
  9. That’s it. Get cracking! You can try and cut neat little pieces with a sharp knife or just randomly break them apart with your hands.
  10. Store in an air tight container in the refrigerator or at room temperature if its not too warm.

cracker toffee

Happy munching!

The case of disappearing crackers

PF1

You wont believe what happened! I actually witnessed a platter full of appetizing buttery crackers disappear in the blink of an eye. Really, its a true story.

If you like snacking and munching as much as i do, you would know exactly what I’m talking about. These humble yet delicious crackers have a tendency of disappearing real quick. Just cant have one! You know what Im talking about right? Crisp, buttery, flaky and salty with a hint of sweetness. Yes, butter puffs ofcourse.

PF2

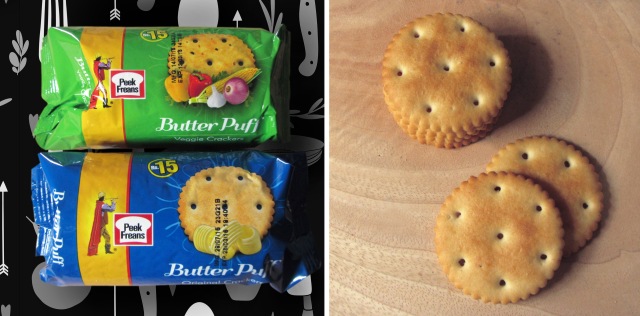
Over this weekend my brain cells were set in motion and taste buds were activated when i received 2 packs of Peek Freans Butter Puff. I didn’t know Butter Puff came in a veggie flavor too, did you? So with these two half roll packs i was thinking…hmm, that’s interesting (with a smile on my face and ideas running through my head). Ofcourse, the universally loved cheese and cracker pairing is my all time favorite snack. But, trust me you cant stop at that. And If you think you don’t like them much then you are just not eating them right. You’re actually missing out on some seriously addictive stuff.

Butter Puff recently introduced the #14WaysToButterPuff . Which by the way is an awesome source for any foodie looking for some creative party food. So now if you brew me some coffee and give me a pack of these crisp golden Butter Puff crackers, you can count on me to turn them into a delicious party for your tastebuds. Wanna know how? Here’s how:

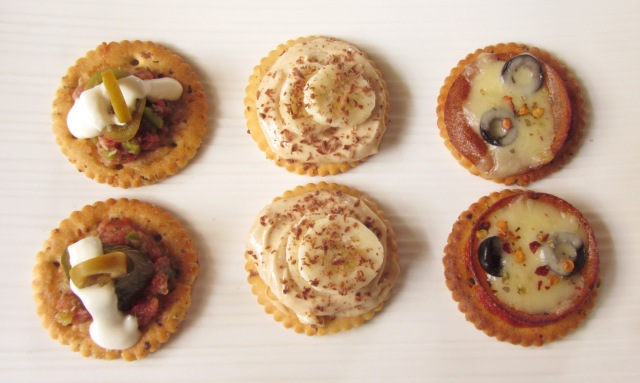
Butter Puff 3 ways

PF3

This is my take on Butter Puff hors d’oeuvres. Feel free to get inspired and create your own delicious treats with the flavors you like. For more inspiration and ideas, do check out the Peek Freans Butter Puff page and get snacking.

WHAT YOU NEED:

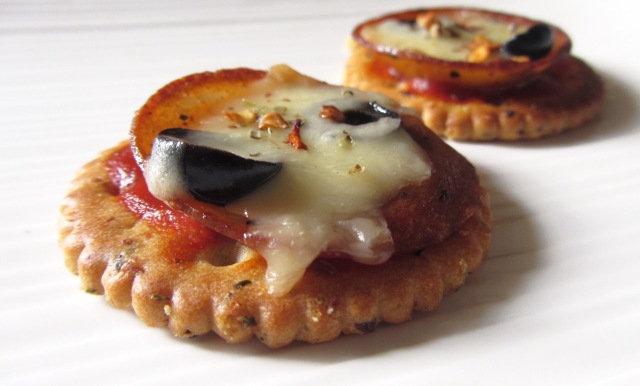
For Pizza Bites

  • 1 pack (half-roll) Butter Puff Veggie Crackers
  • Pizza sauce
  • Pepperoni
  • Mozzarella cheese, grated
  • Olives

To prepare the pizza bites – Place all the Butter Puff Veggie Crackers on a baking sheet, lined up nicely. Top with a teaspoon of pizza sauce, a pepperoni slice, olives of your choice and then almost a teaspoon of the grated cheese. (I also added a dash of oregano and red chili flakes) Then pop the baking sheet into the oven under the hot broiler. Leave it in for a few minutes, just enough to melt the cheese on top. That’s it, they are done and ready to serve.

For Peanut Butter Treat

  • 1 pack (half-roll) Butter Puff Original Crackers
  • Peanut butter mousse
  • Bananas, sliced
  • chocolate, grated

To prepare the peanut butter treat – Make the peanut butter mousse ahead of time. It keeps well refrigerated for 2-3 days. You can follow the following recipe to make the mousse:

Ingredients

  • 6 tablespoon heavy cream
  • 1/2 cup powdered sugar
  • 1/4 cup creamy peanut butter
  • a tablespoons of milk
  • 1/4 teaspoon vanilla extract

Directions

  1. In a glass bowl, beat heavy cream using any kind of electric beater until it begins to thicken and holds a stiff peak. Refrigerate.
  2. In another bowl add peanut butter and beat until fully. Slowly add the powdered sugar. Add milk and vanilla. Beat until all ingredients are fully incorporated.
  3. Fold in whipped cream, using a spatula. Refrigerate until ready to use.

Once you have the mousse ready, all you have to do is line up the Butter Puff Original Crackers in your serving platter and begin with spooning a heaped teaspoon of the mousse onto it, followed by 2 slices of banana and then sprinkle with grated chocolate. Done.

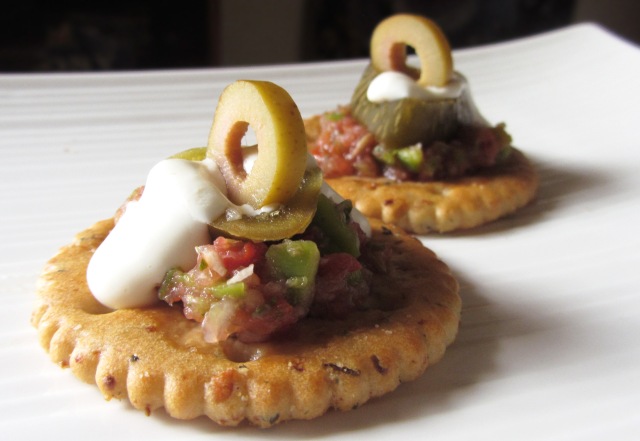
For Hot Salsa Bites

  • 1 pack (half-roll) Butter Puff Crackers
  • Salsa, homemade or store bought
  • Jalapeno
  • Sour Cream
  • Olives

To prepare the hot salsa bites – You can use any of the 2 Butter Puff flavors. I opted for the Butter Puff Original Crackers since there’s already complex delicious flavors in the salsa topping i used. Make these right before serving by lining them up on the platter. Top with a teaspoon of the salsa (make sure to drain it a bit if its too watery). Then add a single piece of sliced jalapeno for that extra kick, followed by a drizzle of sour cream and then an olive on top. Yum. The adults at your party will be all over it.

Simple stuff but taste so good. So, get the party started and get snacking.

Makes approximately 70 individual bites.

* Not ideal for making ahead of time. Prepare these hors d’oeuvres just before serving. It hardly takes 10-15 minutes so nothing to worry about.

PF5

peanutbutter and banana

PF4

P.S. amidst all this cracking affair i discovered the most amazing stuff. I did, i did. Oh boy, it’s addictive, its sugary and you wont be able to stop gobbling it all up. It’s my new favorite and i want to be selfish and not share. Hmm.

Nahh…don’t worry, the generous me kicked out the selfish me. I’m all about sharing. So stay tuned It’s coming up next and if you have an active sweet tooth, you don’t wanna miss it.

Happy Munching!

* This is a sponsored post and contains affiliate links *

What I ate: Lasagna

I totally agree with the worldwide opinion that lasagna is at best the classic comfort food out there, and i think we should thank the Italians for that. When i crave lasagna, the drool-worthy image that appears in my head is the traditional pasta layered with a hearty tomato sauce, meat and cheese…all kinds of cheese. Sigh! heavenly. Although as much as i love to cook, there are days when i don’t even want to step into the kitchen or just those days when the kids have nagged me more than usual and I need something comforting to stay sane. Thanks to Facebook, i get to satisfy my food cravings without rummaging through my pantry.

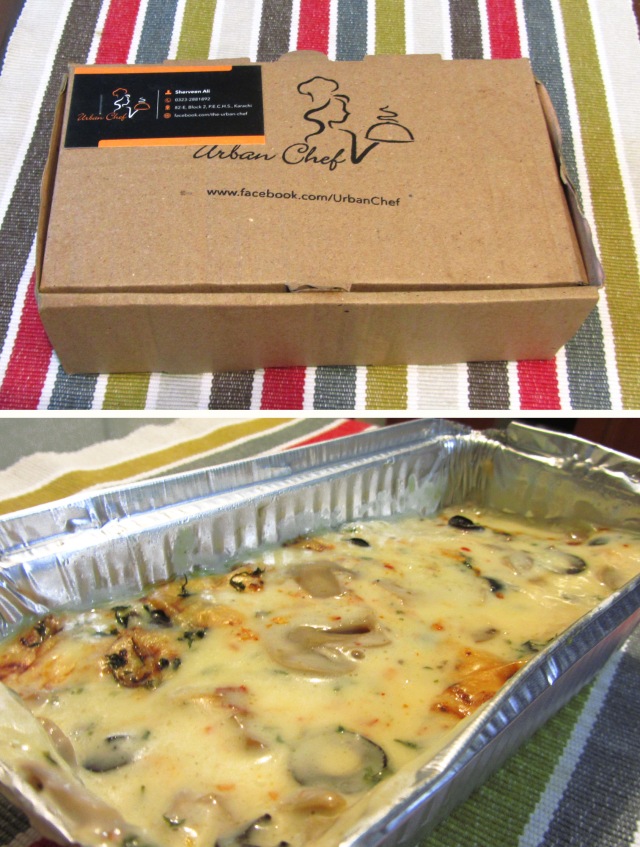
I came across this post in a Facebook group advertising ‘Divine White BBQ Chicken Lasagna’ and i just wanted to try it so bad. I love the fact how social media has given a chance to all these talented cooks out there who are now working from home providing a whole range of delicious food that can be delivered right to our doorstep. It’s especially such a blessing for people like me who cannot go out and about every time a craving hits. I’m honestly ecstatic about these home-based eateries.

11754905_1609942649276295_4781931181644003083_o

Photo courtesy: Urban Chef

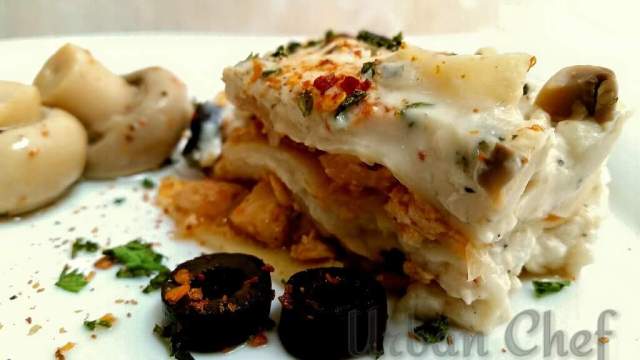
So, yes i ate this White BBQ Chicken Lasagna over the weekend by Urban Chef. It is run by Sherveen Ali, you can checkout her page on Facebook. I had read great reviews about her lasagna which ofcourse had intrigued me more to try it out. Although im the sort of person who likes to try the food myself before believing everyone else’s opinion. Solely because i believe everyone has a unique flavor palate…you may not like something i truly love.

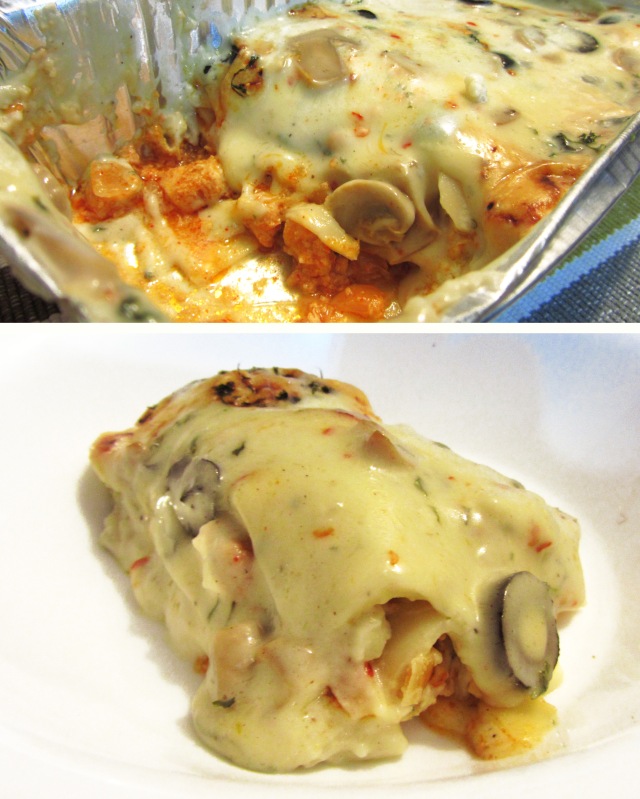
Anyway, lets talk about Urban Chef’s BBQ lasagna. To start with it was neatly and securely packaged, so it reached me in good condition. No spills. yay! It was fresh and still quite warm and i couldn’t wait to dig in (hence the hasty photography that follows. Pardon me). I ordered a 1 litre pack of this yummy lasagna at a very reasonable price i must say. The quantity was good enough to serve 3, but i actually managed to devour it all by myself. It was quite a fulfilling dinner and breakfast the next morning. Well, you know i need the extra calories. I have a toddler in the house!

This lasagna had good four layers of pasta sheets filled with lots & lots of BBQ chicken chunks and a very cheesy sauce. Of course this was the ‘desi/Pakistani’ version of the lasagna so the chicken was quite spicy but the overall balance of flavors were pretty good. I just wish it had more creamy sauce and less cheese. Uh-oh did i just say less cheese?! sounds crazy even to me, but i feel it would have balanced it more perfectly. I also loved the addition of mushrooms and olives, not a bad fusion at all i would say. Even though Im more used to making and eating the classic version of lasagna, i still liked this desi version. Its always interesting to see how different cooks bring different flavors to the same dish.

las1 las2

So treat your taste buds and try it out for yourself. Happy Eating!

Disclaimer: The personal views and opinion about the food are entirely my own and completely unbiased.

Chicken Teriyaki Noodles

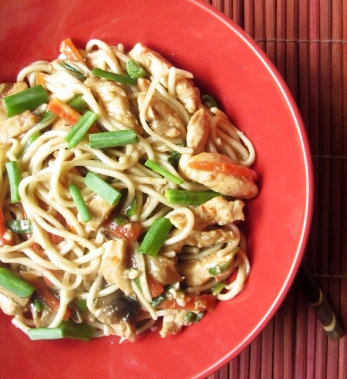
There’s nothing like home-cooked food that’s easy to make and deliciously comforting too. These Teriyaki noodles fit the bill perfectly.

Before you dive into this recipe, you might want to know that the base of this delicious recipe is a Japanese sauce. The Teriyaki Sauce! It’s basically a traditional Japanese cooking sauce that was originally used as a marinade for grilling or broiling fish and other meat. Recently this sauce has picked up popularity all over the world and is used as a flavor that brings magic to so many dishes. This sauce is pretty much made up of salty soya sauce, sugar and ginger, so when cooking with it be careful not to add too much additional salt. Although feel free to spike the spice level if that’s what you like.

teriyaki noodles

INGREDIENTS:

Boneless chicken, julienned/bite size strips – 200 grams, roughly 1 cup

(for the marinade)

Soya sauce – 1/2 tsp

Red chili flakes – 1/2 tsp

Ginger, freshly grated – 1/4 tsp

Egg Noodles – 100 gms (half pack)

Teriyaki sauce – 2 tblsp

Soya sauce – 1 tsp

Brown sugar – 1 tsp

Chicken stock – ½ cup

Crushed black pepper – ½ tsp

Red chili flakes – ½ tsp

Cornflour – 1 tsp

Oil – 4 tblsp

Garlic, finely chopped – 4 cloves

Sesame seeds – 1 tsp

Carrots – 1 medium, julienned

Mushrooms – ¼ cup

Green chillies – 2, slit into 2

Spring onions, chopped 1 inch long  – 2 stalks

Lemon juice – 1-2 tblsp

DIRECTIONS:

  1. Marinate the chicken with soya sauce, red chilli flakes and grated ginger for 30-60 mins.
  2. Heat a teaspoon of oil in a pan, and cook the chicken until tender. Do not overcook or the chicken will turn out too dry.
  3. Now in a small bowl, mix together Teriyaki sauce, soya sauce, brown sugar, red chili, black pepper and chicken stock (or plain water). Set aside.
  4. Boil the egg noodles in salted water as per the directions on the pack.
  5. Next, heat up a wok. Add 4 tblsp oil and garlic and saute until fragnant.
  6. Add the carrots, mushrooms and sesame seeds and stir fry for a minute.
  7. Add in the green chillies and spring onions. Toss to heat them up.
  8. Now add the prepared sauce mixture and mix to combine with the veggies.
  9. Dissolve cornflour in a little amount of water and slowly add to the sauce mix. Once it starts thickening up, toss in the chicken strips and boiled noodles.
  10. To finish it up add fresh lemon juice for that extra zing. Mix it well and dish up.

Top Tip: Your most important utensil in the kitchen is a spoon. Always taste while you cook at every step so you can adjust the taste perfectly as per your liking.

Begin Again

Believe

Hey, don’t get the wrong idea! Im not quitting. Not even close. Neither is this a starting over point. This for me is just the moment where i stop, close my eyes and take a deep breath and reevaluate. Lately, a lot has been happening behind the scenes here at my end. My brain is crammed with ideas and the adrenaline rush is ever so high.

Focusing on the blog today let me tell you whats going on. Over the past year, with my freelance design job and entrepreneurial adventures, the blog usually took a back seat. That is just not what i had in mind when i initially started blogging. But i also didn’t want to take it as a burden, like something i have to do. After the first post i actually kinda fell in love with this blogging world and writing is of course my favorite part. So, why did i start blogging exactly? Yup, its already that time.. The time to really think about why i started and where do i wanna go. The good news is i think i do know. And knowing that…knowing what i want is truly motivating. Everything seems to fall into place when you know where you’re headed, even though the future is always uncertain.

I created ‘Coffee & Zest’ in 2013 with a whole lot of passion and excitement and the intention was to share my love for food with the world. This blog was my space to express, share and speak out. I started off by sharing tried and tested recipes which has been quite fulfilling so far, but i want more. I want to do more. Express more. I know i can do that best through writing, and if you ever meet me in person you would totally agree with that too. so now i want this digital space of mine to truly reflect who i am and where I’m going. I will still be sharing the much loved recipes along with a bit more of my life and make you see the world through my eyes or rather my food. Hopefully from now on if you happen to drop by my blog you will notice more interesting posts that i would love to get some feedback on 🙂

At the end of the day its all about the balance. I desperately need this balance in my life right now while focusing on doing what i love most. I love creating, designing, baking and writing. I need this ALL in my life but i know, i know…i have to set my priorities straight. C’est la Vie.

Besides the changes in my blogging journey, I am also making some changes in my professional life. As a freelance communication/graphic designer, I have decide to re-establish myself. Going forward i want to be more focused as a designer too and i believe i have found just the right design niche for myself. You can get to know more about that part of me here.

So Im all excited. I know what I’m doing or at least i think i do. *fingers crossed*

My motto for life: Do What You Love!

See ya around!

COOK WITH US: A recipe and heaps of inspiration

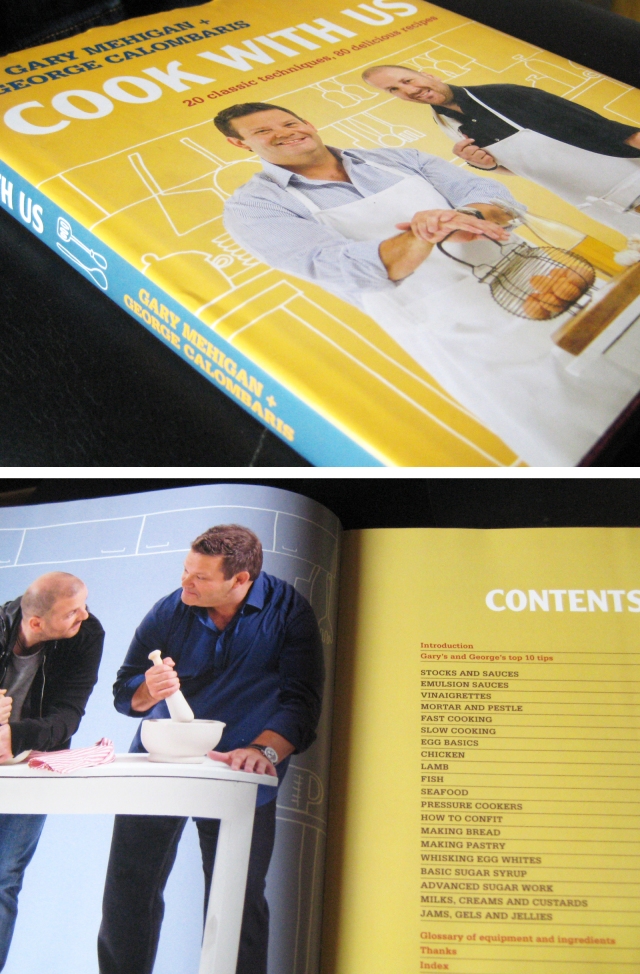
I love watching Masterchef Australia. It’s intense, it’s entertaining and the best part is that you get to learn so much from it. For me it’s a lot more than just a cooking competition show. Honestly, when its airing I am completely hooked to it and this is where i get most of my inspiration from. It enhances and takes my love of food to the next level. I can go on and on, all praises for this mouthwatering fascinating show, but lets get to the point quickly. I recently found George and Gary’s cookbook “Cook With Us” in a local bookstore and instantly grabbed it of course. (FYI, this is their second cookbook together) I simple adore these guys, so you can well imagine my excitement. The three hosts, George, Gary and Matt seem like the most wonderful people on-screen, who know exactly what they are doing. And ain’t George just hilarious?! So, being an avid MasterChef Australia fan, while i was reading the introduction of their cookbook, I could actually hear their voices in my head (and no, trust me not creepy at all) just simply heart warming. It’s like having a good conversation with them. And that surely is a treat. I’ve been indulging into their cookbook obsessively over the past week, and I thought i should share this love for food and flavors with all the other cooking enthusiasts out there. There’s tons of good cooking advice in here, which is just what any novice cook needs. What i love and appreciate most is that the recipes are true to them – If you have been following the show all seasons you get to know these people well, so even by just reading the recipe I can tell whose it is. That i believe is the most amazing thing about cooking and food; It reflects your personality and who you are. cb8   cb1 cb4 Oh and the photos in this cookbook are equally enticing with a simplistic theme. No clutter, no extra props, just simple, delicious looking food. Definitely makes you go WOW! There are a few recipes in here that I’m particularly excited to try. But today I’m going to share the very first recipe i’ve tried from their book. It’s simple yet delicious and doesn’t require laborious hours in the kitchen. It’s Gary’s Tahini & Yoghurt Dressing. It can be served with fish, chicken or as a salad dressing (or just about anything you may like).

mc2

TAHINI AND YOGHURT DRESSING

[Makes about 250ml]

INGREDIENTS:

– 200g Greek yoghurt

– 1/4 cup tahini

– finely grated zest and juice of 1 lemon

– 1 clove garlic, crushed and finely chopped

salt, to taste

– 1 tblsp extra virgin olive oil

DIRECTIONS:

1. Drain yoghurt in a fine mesh sieve lined with muslin cloth. leaveto drain over a bowl for about 4 hours in the fridge. (I used regular yoghurt that we get here and drained it in a muslin until it stopped dripping – about 30-45 mins). Set the liquid (whey) aside in case you want to thin the dressing later.

2. place this thick yoghurt in a bowl, mix in the tahini, lemon zest and juice, garlic, salt and olive oil. mix all together until smooth. Taste and adjust seasoning if required.

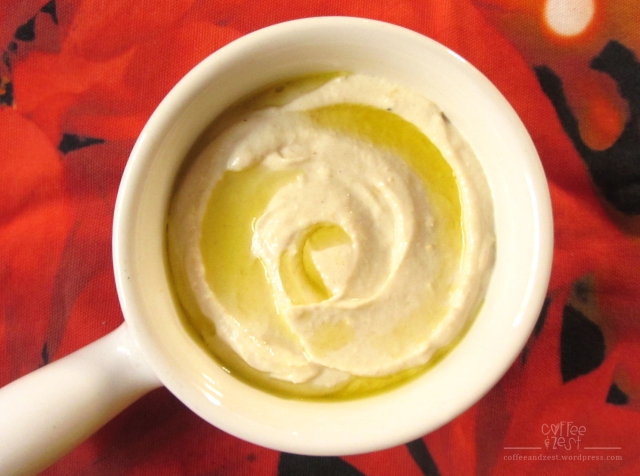
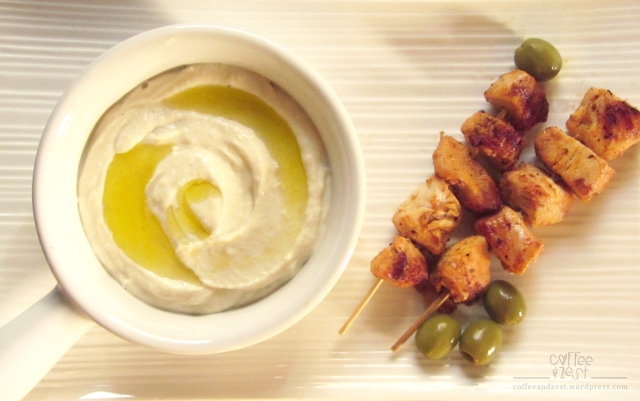
3. It’s ready to serve. You can store leftover dressing in an airtight container in the fridge for up to 1 week. I served this with grilled chicken skewers…more like a dip than a dressing. mc1 Cooking Tip: Recipes aren’t set in stone, they’re only guidelines. – George Calombaris

Gimme a break!

Some days are so out of control, you just feel like you are drowning and this is it, the worst in you is here to stay and survival seems doubtful. That’s when I’m absolutely convinced that i need therapy. But you know what, besides baking I think retail therapy would do just fine. Although I’m convinced that I pretty much qualify as a bakeaholic, but I’m not really a shopaholic. But once in a while bingeing is totally fine with me. That’s what momma’s do to stay healthy and sane – trust me, it works.

Here’s my top 5 purchases from the year 2014:

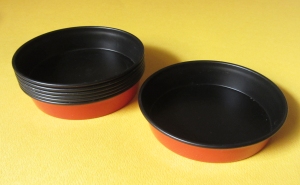
1. These little mini tart pans were love at first sight. They are my favorite pans to use when I’m taste testing pie crusts and cakes.

mini tart pans

2. These 6 double sided cookie cutters are the most versatile & helpful in the kitchen. I use these cutters for cookies, fondant, mini cakes and donuts.

4

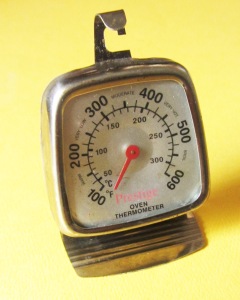
3. This Oven Thermometer is my MOST used tool in the kitchen. I’m a little obsessed with precision, so just cant do without this.

2

4. Lately I had been experimenting with different bread dough and when i saw this baguette pan, I just had to buy it. Just looking at it makes me want to bake bread and of course also looks more professional.

5

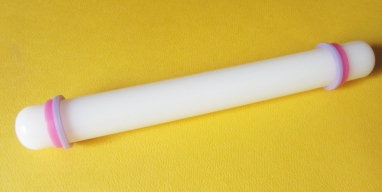
5. Last but not the least this Wilton Rolling Pin is definitely my top 5. Besides rolling fondant, i use it for pie crusts, puff pastry and cookies all the time. Psst..I’m not much of a fondant person, but if that’s what the kids want, then that’s what the kids get. Sucha good momma, right!

3


What’s your most favorite and useful tool in the kitchen? would love to know 🙂

The madness of motherhood…and cake!

In the past 5 years since being a momma, I’ve faced many types of “ME” – there are faces of me that i didn’t even know existed. I think a lot of mothers would nod their heads in agreement with me saying that my kids bring out the best and worst in me. I guess that comes with the package. Can’t believe that over JUST 5 years, we have added smiles, tears, laughter and loads of memories ( and millions more to come) to my treasure. Well i will take that as my reward for all the sleepless nights and stressful days. Now, why not celebrate his 5th birthday and me surviving these 5 years of mommy-hood – a fun, scary, sweet and unpredictable roller coaster ride. Birthdays are of course just the right reason to celebrate and bake some cake.

That’s when i go into planning mode and trust me I go into planning mode a lot. As a mother at times it feels like I’m not doing enough, I’m not the best momma…of course I have my low moments often but honestly, as mothers we do a lot for our kids every single day, we take every chance we can to cheer them up…but I’m thinking i want to do something a little more that would light up his face on his day. What more could a mother want, right?!

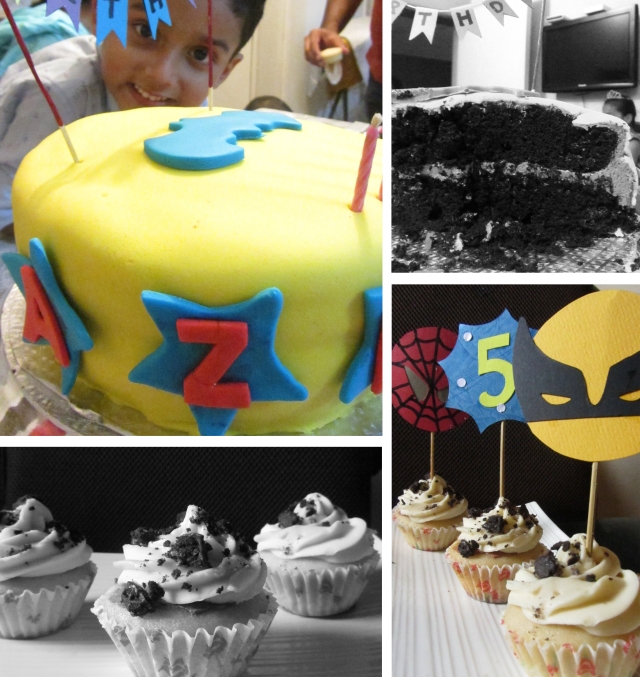
So onto the birthday cake. I baked him one in hopes that he will love and remember it. These days he’s into super heroes, mimicking them and being them. So, it was a mini superhero themed birthday and the fun in it for me was baking the cake and doing the decorations myself. A lot of work but oh so satisfying and totally worth all the effort. My boy was ecstatic. He loved it all…well, except actually eating the cake. Sadly these kids no nothing about good food…hmph. Imagine, my boy doesn’t eat CAKE! Shocking.

birthday collage

Voila! It was my first attempt at fondant, which turned out pretty well. My boy totally digged the superhero theme. The cake was a moist chocolate cake with a layer of chocolate butter cream enveloping it. Plus the absolutely yum vanilla cupcakes with slightly coffee flavored vanilla frosting topped with OREO crumbs. Ahh, satisfying.